This tool aligns a series of burst photos on a subject (for example its eye), then exports the aligned photos to a folder or directly as a video (with an optional shutter sound).
It was developed and tested on Mac only. It should also work on Windows but has not been tested there (see On Windows for the differences). The tool itself is in French: the names of its buttons and options are given below in French, with a translation the first time they appear.
Downloads
- pinpoint.pyv1.0.0 · SHA-256 c7eb20337b36fa6c… The script: a single Python file, shutter sound included.
- declencheur_sony_a7ii.wavSHA-256 c68d67c941c9d415… Sony A7 II shutter sound
No warranty
This tool, made with Claude, is provided without any warranty. You use it at your own risk. The script never modifies the original photos and refuses to export into their folder, but always keep a backup of your photos.
Examples
Here is the video output of the tool on three Western marsh harrier bursts taken in Jersey, aligned on the eye:
Installation
You need Python 3.9 or newer. The simplest way is the installer from python.org.
Do this once, in the Terminal, from the folder where pinpoint.py is (here Downloads):
cd ~/Downloads
python3 -m venv pinpoint-env
pinpoint-env/bin/python3 -m pip install PySide6 opencv-python numpy imageio-ffmpeg
This creates the virtual environment and installs the libraries.
Then, to launch the tool, just use the Python of the virtual environment (so you do not have to activate it) on your photo folder (or without an argument if you would rather pick the folder later):
pinpoint-env/bin/python3 pinpoint.py ~/Photos/serie
The tool reads JPEG, PNG and TIFF photos (8 or 16 bits) but not RAW files. Optionally, exiftool (brew install exiftool) copies the metadata of the original photos onto the exported ones.
On Windows
The tool has only been developed and tested on Mac, but it relies on libraries that also exist on Windows (Qt, OpenCV, ffmpeg), so it should work there with a few adjustments.
Install Python if you do not have it yet, from python.org. The commands are the same as on Mac, in the command prompt, with py instead of python3 and Scripts\python instead of bin/python3. Do this once (in the folder where you put the tool):
py -m venv pinpoint-env
pinpoint-env\Scripts\python -m pip install PySide6 opencv-python numpy imageio-ffmpeg
Then, to launch the tool (with the photo folder, or without an argument if you would rather pick the folder later):
pinpoint-env\Scripts\python pinpoint.py "C:\Photos\serie"
The other differences between Mac and Windows:
- exiftool (optional): there is no
brewon Windows. Download the Windows version from exiftool.org, renameexiftool(-k).exetoexiftool.exeand put it in a folder on thePATH. Without exiftool, the export still works but without the metadata. - Paths with accents: on Windows, OpenCV does not read paths that contain accents or special characters correctly (for example
C:\Users\Rémi\Images). It is better to put the series in a folder with a simple path (for exampleC:\Photos\serie). - Shortcuts: Ctrl replaces ⌘, Alt replaces ⌥ and Shift replaces ⇧ (see the shortcuts table).
- Trackpad: moving around the image with two fingers only works on Mac. On Windows, you move by dragging the image and the wheel zooms.
- Video and sound: ffmpeg is installed with
imageio-ffmpeg, there is nothing else to install.
How to use it
1. Select a sequence of photos
Start by choosing a continuous sequence of photos, that is photos that follow each other in the burst, with no gap in the middle. Copy them into a separate folder, then open that folder in the tool (with « Ouvrir un dossier… », "Open a folder…", or by giving it at launch).
The tool takes all the photos in the folder, in the order of their file names. If photos are missing in the middle of the series, the subject will jump in the video. A failed photo can still be set aside afterwards with the S key.
2. Mark the eye
Click on the subject's eye (or on whatever you want to follow) on each photo. The tool then computes the shift to apply so that the element ends up in the same place as on the reference photo (marked with a ★, which you can change with the R key).
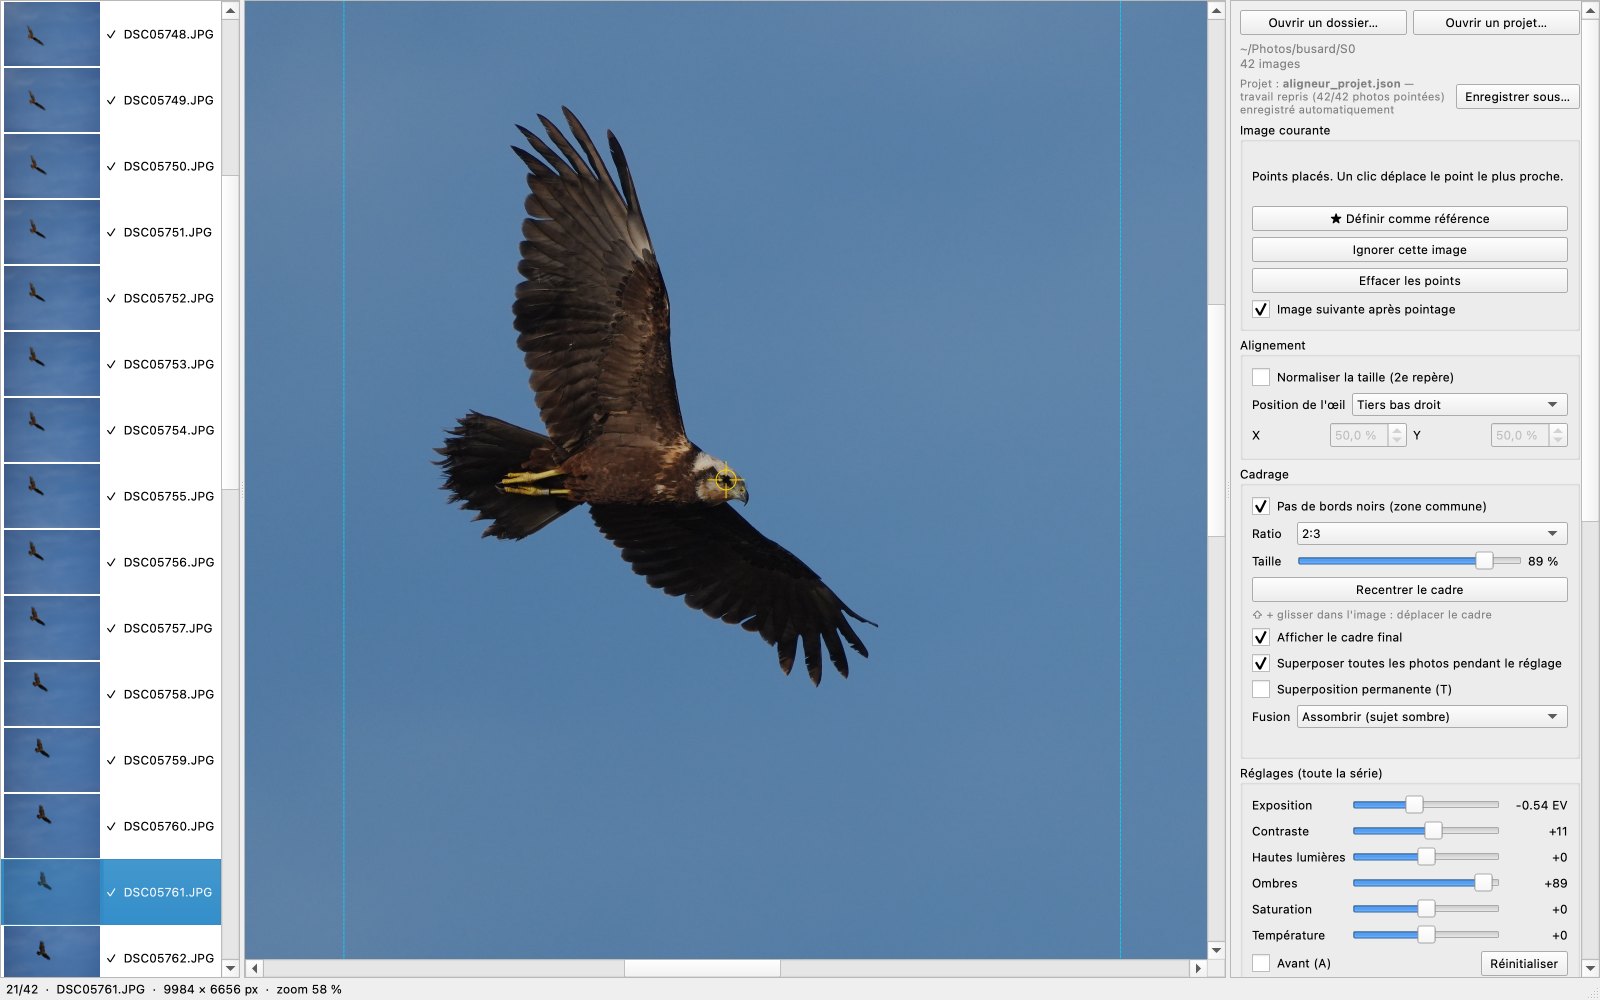
If the subject gets closer or further away during the burst, the option « Normaliser la taille » ("Normalise the size") adds a second fixed reference point (for example the tip of the beak). The tool then compares the distance between the eye and this point on each photo to bring the subject back to the same size.
3. Check the marking
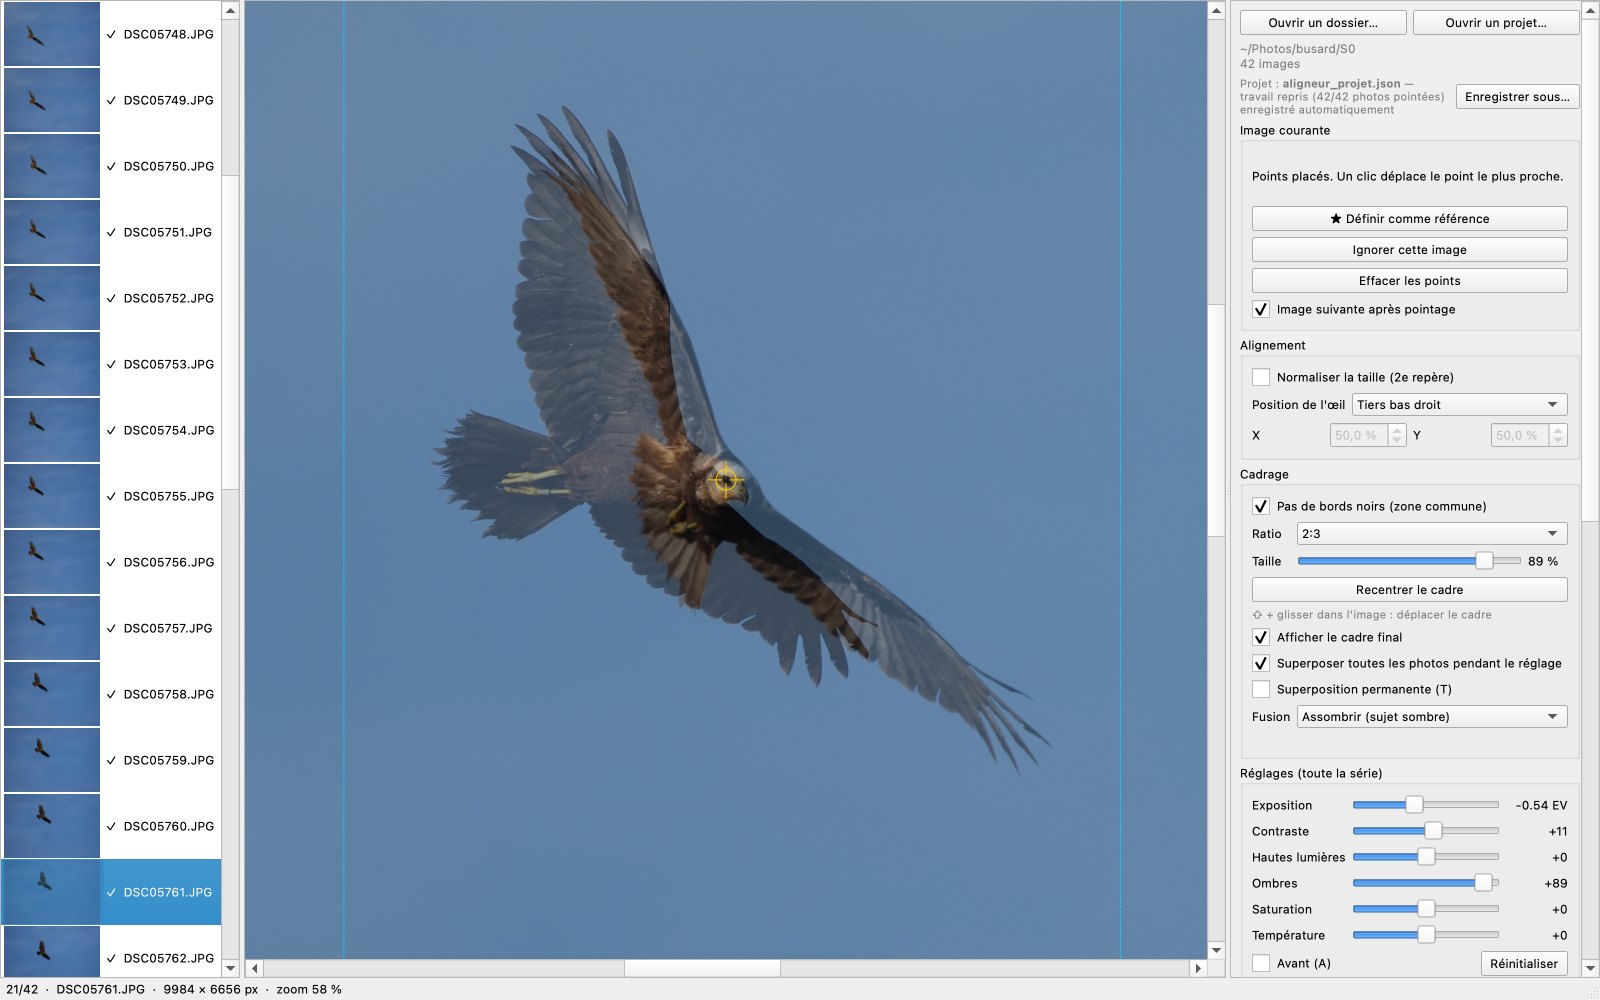
The O key shows the reference photo semi-transparent over the current photo, so you can check that the eye lands in exactly the same place.
4. Frame
The final frame is set with several options:
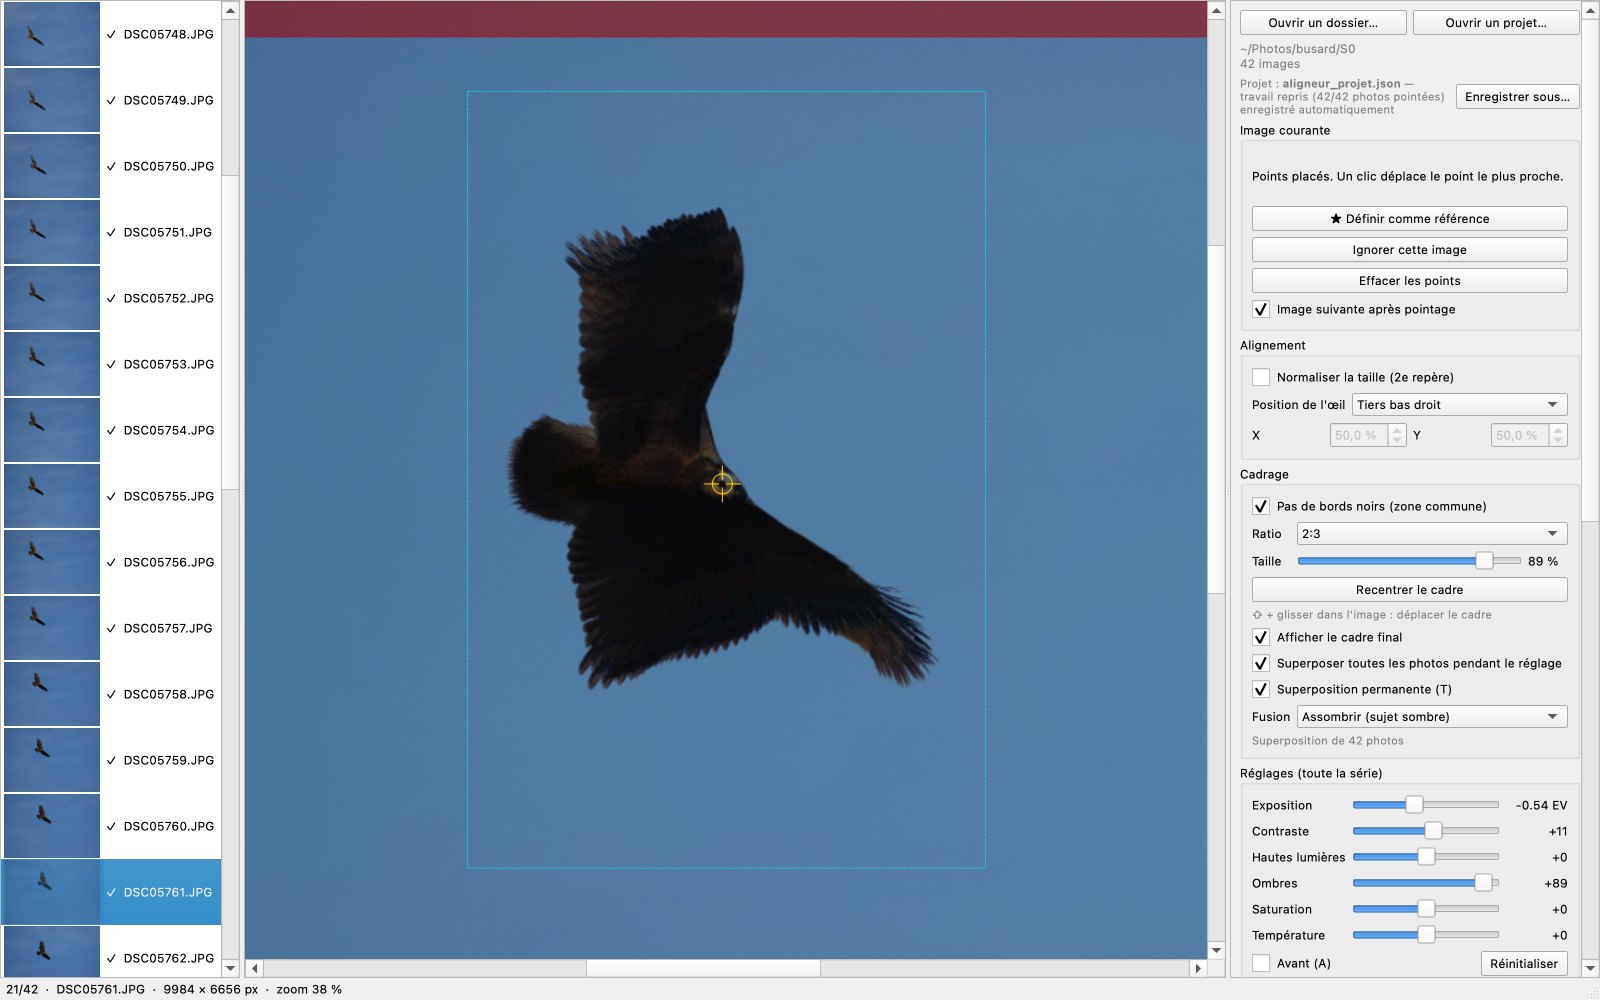
- « Pas de bords noirs » ("No black edges") keeps the frame inside the area common to all the photos. If that area is too small, you can set aside the photos where the subject is the most shifted (S key).
- The ratio (3:2, 16:9, 1:1, 4:5…), the size of the frame and its position (⇧ + drag).
- The position of the eye in the frame: as on the reference, in the centre, on a third or wherever you like.
While you adjust, all the aligned photos are superimposed, so you can see right away whether a wing leaves the frame. The Assombrir ("Darken") mode keeps the darkest pixel of the series (handy for a subject against a bright sky), Éclaircir ("Lighten") keeps the lightest and Moyenne ("Average") blends all the photos. The areas in red are those not covered by every photo.
5. Adjust
The exposure, contrast, highlights, shadows, saturation and temperature settings apply to the whole series, to save time and to keep the brightness from varying from one image to the next in the video. The A key lets you compare before and after. You need to find a compromise that suits the whole series.
6. Export the photos (option 1)
The aligned photos are exported to a separate folder (by default <folder>_aligne), with the same name as the original, in the original format, as JPEG or TIFF (16 bits is kept in TIFF). If exiftool is installed, the metadata of the original photos is copied.
7. Export the video (option 2)
The tool can also create an MP4 video (H.264) straight from the series, with several settings:
- the frame rate, from 1 to 120 frames per second (15 frames per second works well to give you time to appreciate the images);
- a pause on the last photo;
- the resolution (HD, QHD or 4K), never enlarging the photos.
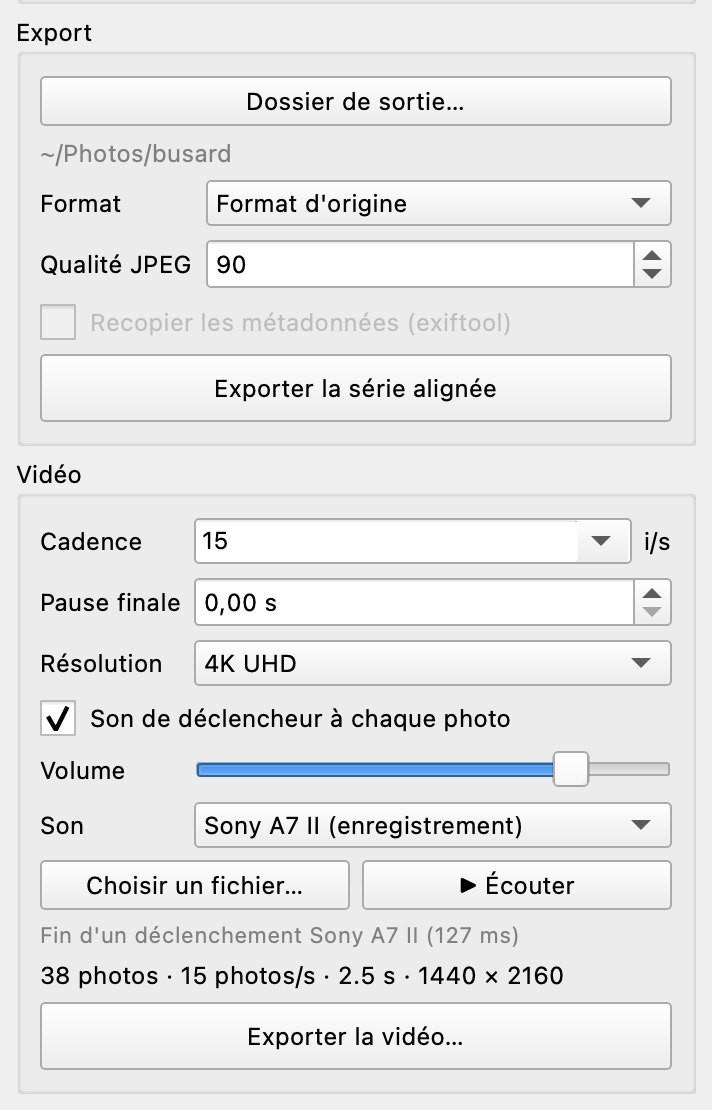
Optionally, a shutter sound can be added to each photo. You can choose the recording of a Sony A7 II or your own audio file.
Saving
All your work is saved automatically in a pinpoint_project.json file placed next to the photos. When you reopen the folder, you pick up where you left off.
Shortcuts
| Action | Mac | Windows |
|---|---|---|
| Place the eye (then the 2nd reference point) | click | click |
| Place / move the 2nd reference point | ⌥ + click | Alt + click |
| Move the frame | ⇧ + drag | Shift + drag |
| Move around the image | drag, or two fingers on the trackpad | drag |
| Zoom | pinch, wheel, + / − | wheel, + / − |
| Next / previous | → or Space / ← | → or Space / ← |
| Reference | R | R |
| Skip the photo | S | S |
| Clear the points | ⌫ | Backspace or Delete |
| Overlay the reference / all the photos | O / T | O / T |
| Before / after adjustments | A | A |
| Fit / actual size | F / Z | F / Z |
| Open / export | ⌘O / ⌘E | Ctrl+O / Ctrl+E |
Under the hood
The alignment calculation
for name in sess.names:
    if not sess.complete(name, n_pts):
        continue
    e = sess.images[name]
    p, (W, H) = e["pts"], e["size"]
    s = 1.0
    if n_pts == 2:
        d = math.dist(p[0], p[1])
        if d < 1:
            continue
        s = d_ref / d
    ox, oy = T[0] - s * p[0][0], T[1] - s * p[0][1]
    tf[name] = (s, ox, oy)
    ix0, iy0 = max(ix0, ox), max(iy0, oy)
    ix1, iy1 = min(ix1, ox + s * W), min(iy1, oy + s * H)
Each photo gets a scale s and an offset (ox, oy): a point p of the photo ends up at s × p + (ox, oy), which puts the eye on the target T. The last two lines compute the area covered by all the photos. The tool only corrects position and size, not rotation.
The superimposition
if mode == "mean":
    acc += w.astype(np.float32) * m[..., None]
else:
    inside = (m > 0.99)[..., None]
    cand = np.where(inside, w, ext)
    ext = np.minimum(ext, cand) if mode == "min" else np.maximum(ext, cand)
cnt += m
Each realigned photo (w) is combined with the previous ones using its coverage mask (m), and cnt counts how many photos cover each pixel.
The shutter sound
A sound is placed at the moment of each photo. On a fast burst the sounds overlap, and a soft limiter prevents saturation.
def build_audio(n_photos, total_frames, fps, sound, volume):
    n = int(math.ceil(total_frames / fps * AUDIO_SR))
    out = np.zeros(n, np.float32)
    snd = sound * volume
    for i in range(n_photos):
        a = int(round(i / fps * AUDIO_SR))
        b = min(n, a + len(snd))
        if a < n:
            out[a:b] += snd[: b - a]
    peak = np.abs(out).max()
    if peak > 0.98:                                   # fast burst: overlapping sounds
        out = np.tanh(out / peak * 1.5) / np.tanh(1.5) * 0.98
    return out